Construction Techniques and Tutorials

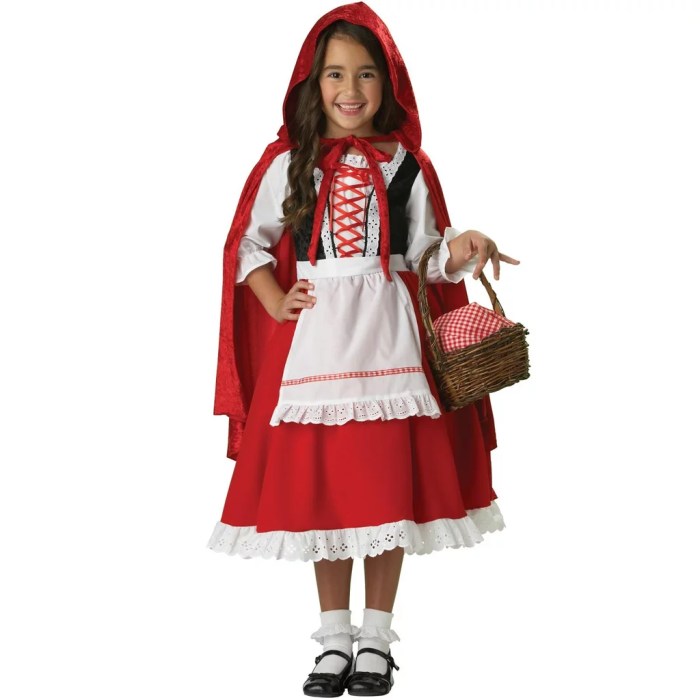
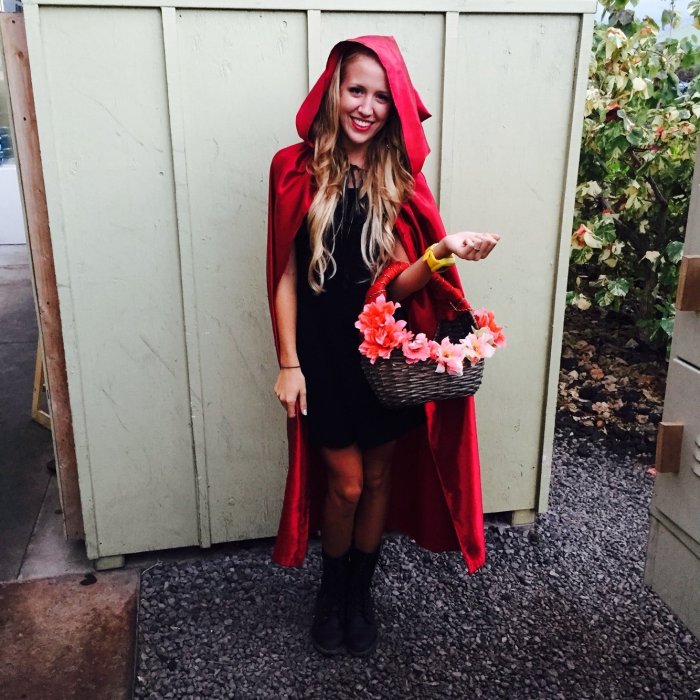
Little red riding hood diy costume – Creating a Little Red Riding Hood costume involves several steps, from crafting the dress to constructing the iconic red hood and basket. This section provides detailed instructions and comparisons of different techniques to help you build a high-quality costume. We’ll explore various methods for achieving a perfect fit and suggest materials for optimal results.
Little Red Riding Hood Dress Construction
The dress is the foundation of the costume. A simple, long-sleeved red dress can be made using various techniques. One approach is to use a pre-made pattern, adjusting it for the desired fit. Alternatively, you can create a simple rectangular dress using measurements of the wearer’s body.
- Pattern Method: Choose a pattern for a long-sleeved dress, ensuring it’s the right size. Follow the pattern instructions carefully, paying attention to seam allowances and fitting adjustments. This method ensures a professional fit and allows for more intricate details.
- Rectangular Method: Measure the wearer’s chest, waist, and length from shoulder to desired hemline. Cut two rectangular pieces of fabric for the front and back, adding seam allowances. Sew the side seams, then add sleeves (cut from separate fabric pieces) to the armholes. Finish with a simple hem. This method is quicker but might require more adjustments for a perfect fit.
Hood Construction Techniques
Creating a perfectly fitting hood requires careful attention to shaping and measurements. Two primary techniques are presented below.
- Pattern Method for Hood: Use a commercially available hood pattern or draft your own. This method allows for a more precise fit and the possibility of incorporating more detailed features, like lining or boning for structure. Accurate measurements are crucial for a comfortable and well-fitting hood.
- Simple Shaping Method for Hood: Cut a semicircle of red fabric, adjusting the radius to fit the wearer’s head circumference. Add seam allowances to the straight edge. Sew the straight edges together to form a cone shape. This method is faster but may require adjustments to ensure a snug fit. The top edge can be gathered and sewn to create a more fitted look.
Basket Prop Construction
The basket is a key accessory for the Little Red Riding Hood costume. Several materials and methods can be used to create a convincing prop.
Choosing the right materials is key to creating a realistic-looking basket. Consider the overall look and durability you desire. Some materials are easier to work with than others.
Crafting a Little Red Riding Hood DIY costume offers a delightful challenge, allowing for creative expression in fabric choices and embellishments. For a contrasting yet equally rewarding project, consider the intricate details involved in a diy oogie boogie costume , a testament to imaginative costuming. Returning to our woodland heroine, remember to add those finishing touches to your Little Red Riding Hood outfit, ensuring a truly captivating effect.
- Cardboard Basket: Cut and assemble cardboard pieces to form a basket shape. Reinforce seams with tape or glue. Decorate with paint, paper, or fabric to resemble wicker.
- Fabric Basket: Use stiff fabric like canvas or felt. Cut and sew pieces to create the basket shape, adding interfacing for structure. Handle can be made from fabric, ribbon, or rope.
- Recycled Materials Basket: Repurpose materials like plastic containers or wire mesh to create a unique basket. This is a great way to add a sustainable element to your costume.
Accessory Creation and Customization

Transforming your Little Red Riding Hood costume from ordinary to extraordinary involves carefully selected and handcrafted accessories. These details elevate the overall aesthetic and bring a unique personal touch to your portrayal. Consider these options to enhance your costume and create a truly memorable look.
Personalized Basket Options, Little red riding hood diy costume
A basket is quintessential to Little Red Riding Hood. Instead of a generic basket, consider these unique options:
- The Embroidered Basket: A simple wicker basket can be dramatically improved with embroidery. Use red thread to stitch simple flowers or a charming red-riding-hood-inspired design onto the basket’s side. This adds a personalized touch and complements the costume’s color scheme. Imagine a small cluster of red poppies or a stylized wolf’s paw print. The embroidery should be simple enough to execute without requiring advanced sewing skills.
- The Beaded Basket: For a more glamorous approach, use small beads to create patterns on a plain fabric basket or to embellish the existing wicker. Choose red, white, and green beads to complement the overall costume, or use contrasting colors for a bolder statement. Consider using seed beads for intricate designs or larger beads for a simpler, more textured look.
This technique requires patience but yields a stunning result.
- The Painted Basket: A plain wooden or fabric basket can be transformed with acrylic paints. Create a whimsical woodland scene, paint charming red flowers, or add a personalized touch with the character’s initials. Use a sealant to protect the paint and ensure the basket’s longevity. This is a great option for those who prefer painting over embroidery or beading.
Custom Necklace Design
A necklace adds a subtle yet impactful detail to the costume.
- The Red Bead Necklace: A simple yet effective choice is a long necklace made from red beads. These could be uniform in size and shape, or a mix of different sizes and textures for a more rustic look. The length should allow it to hang elegantly below the neckline of the costume. This option is both visually appealing and easy to create.
- The Wooden Charm Necklace: Craft a necklace with small wooden charms shaped like apples, mushrooms, or woodland creatures. These can be painted or left natural, depending on the desired aesthetic. Use strong cord or chain to string the charms together. This allows for greater creativity and personalization.
- The Ribbon Necklace: Create a layered necklace using various widths and colors of ribbon. Red and white ribbons, for example, would be a perfect match for the costume’s color scheme. This technique involves simple tying and knotting techniques and offers a unique, textured look.
Unique Shoe Options
Shoes can significantly impact the overall look.
- Embroidered Mary Janes: Simple Mary Jane shoes can be embellished with embroidery, mirroring the techniques used on the basket. Small flowers or simple patterns add a touch of elegance and personalization. The embroidery should be carefully applied to avoid damaging the shoes.
- Red Ribbon Shoes: Tie red ribbons around simple black or brown shoes to create a more whimsical and playful look. This is a quick and easy method to add a pop of color and tie the costume together. Consider using different ribbon textures and tying techniques for added visual interest.
- Painted Boots: Plain boots can be transformed with paint. Consider painting woodland scenes or adding decorative elements that complement the costume. Use fabric paint or acrylic paint designed for leather or similar materials, and apply a sealant to protect the design.
Custom Apron Creation
Creating a custom apron adds an authentic touch. First, choose a simple pattern for a child’s apron. The fabric should complement the dress, perhaps a simple gingham or a plain red fabric. Cut out the pieces according to the pattern. Hem the edges using a sewing machine or by hand-sewing.
Add pockets for carrying goodies. The apron’s simplicity allows the other accessories to stand out.
Embellishing with Handmade Elements
Handmade embellishments add a unique personal touch.
- Embroidery: Use embroidery floss to stitch simple floral patterns or other designs onto the costume. Materials: Embroidery floss, needle, fabric marker.
- Appliqué: Cut out fabric shapes (flowers, leaves, etc.) and sew or glue them onto the costume. Materials: Felt, fabric scraps, fabric glue or needle and thread.
FAQ Compilation: Little Red Riding Hood Diy Costume
How much will this costume cost?
The cost varies greatly depending on the materials you choose and whether you already own some supplies. Budget-friendly options are available, but more elaborate designs might require a larger investment.
What sewing skills are required?
Basic sewing skills are helpful, but this guide is designed to be accessible to various skill levels. Detailed instructions and alternative techniques are provided for those less experienced.
Can I adapt the designs for different ages?
Yes! The designs can be easily adapted for children and adults by adjusting the measurements and fabric quantities accordingly.
Where can I find inspiration for unique design elements?
Look to online resources like Pinterest and Instagram for inspiration. Consider incorporating elements from different eras or cultural interpretations of the story.
